Isopods, also known as woodlice or pill bugs, are fascinating creatures that make for captivating pets. Whether you’re a seasoned isopod keeper or a beginner looking to embark on an exciting journey into isopod culture, creating a thriving isopod habitat is essential for their well-being and reproduction. In this comprehensive guide, we will explore the world of isopod culture, providing you with valuable insights, tips, and step-by-step instructions on how to create the perfect environment for these unique creatures.
Understanding Isopods and Their Needs
Before diving into the details of isopod culture, let’s take a moment to understand these incredible creatures. Isopods belong to the crustacean family and are known for their ability to roll up into a ball when threatened, hence their nickname “pill bugs.” They are found in a variety of habitats, including forests, deserts, and even underwater.
Isopods come in various species, each with its own unique characteristics and requirements. Some popular species include Armadillidium vulgare, Porcellio scaber, and Porcellionides pruinosus. Each species has specific care needs, so it’s crucial to choose the right species for your isopod culture endeavor.

The Isopod Culture Kit: A Comprehensive Solution
To ensure a successful start to your isopod culture journey, investing in a high-quality isopod culture kit is highly recommended. Isopods And More LLC offers a range of full kits and isopod bins that provide all the essential supplies necessary to create a thriving isopod habitat.
A Closer Look at the Isopod Culture Kit
The Isopod Culture Kit from Isopods And More LLC is a comprehensive solution that includes everything you need to create a thriving isopod habitat. Let’s take a closer look at the components included in the kit:
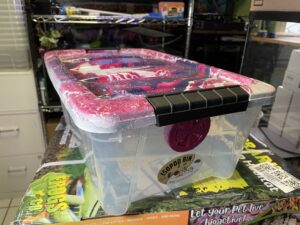
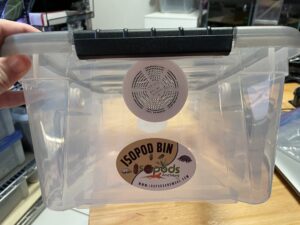
1. Isopod Enclosure
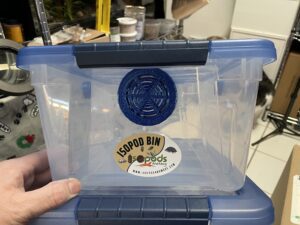
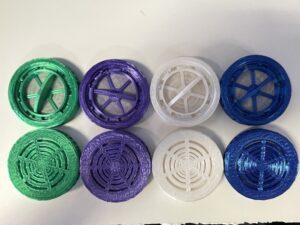
The Isopod Culture Kit comes with a spacious 12 qt container designed specifically for isopod culture. The container features three vents for proper airflow, ensuring a healthy and oxygen-rich environment for your isopods. Its size allows ample space for the isopods to explore, burrow, and reproduce.
2. Isopod Substrate
The substrate provided in the kit is specially formulated to provide your isopods with the necessary nutrients and minerals for their growth and reproduction. It creates a comfortable and conducive environment for your isopods to thrive.
3. Sphagnum Moss
Maintaining the right moisture levels is crucial for the well-being of your isopods. The Isopod Culture Kit includes sphagnum moss, which helps regulate the moisture levels within the enclosure. It also provides a natural source of humidity, mimicking the isopods’ natural habitat.
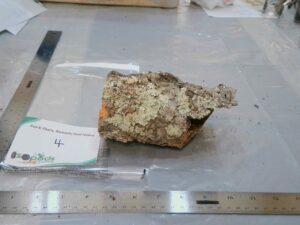
4. Cork Bark Flats
New to the Isopod Culture Kit are 1 to 2 cork bark flats, enhancing the aesthetic appeal of your isopod enclosure. These flats serve as hiding spots for your isopods and aid in maintaining the moisture levels within the container. They create a natural and organic vibe in the habitat, adding an artistic touch to the overall setup.
5. Isopod Cereal
Proper nutrition is vital for the health and well-being of your isopods. The Isopod Culture Kit includes Isopod Cereal, a high-quality food specifically designed for isopods. This nutritious blend of ingredients ensures that your isopods receive a balanced diet, promoting their growth and reproduction.

Step-by-Step Guide to Setting Up Your Isopod Culture Kit
Now that we have a clear understanding of the Isopod Culture Kit and its components, let’s dive into the step-by-step process of setting up your isopod habitat:
1. Clean the Container
Before you begin, ensure that the container is clean and free of any dirt or debris. Wash it with warm water and mild soap, and allow it to dry completely.
2. Add Substrate
Add a layer of the specially formulated isopod substrate to the bottom of the container. Make sure the substrate is evenly distributed and has a depth of at least 2 inches. This allows the isopods to burrow and create their nests.
3. Place Sphagnum Moss
Place a layer of sphagnum moss on top of the substrate. This moss helps maintain the moisture levels within the enclosure, providing a natural source of humidity for the isopods.
4. Position Cork Bark Flats
Position 1 to 2 cork bark flats in the container, creating natural hiding places for your isopods. These flats not only enhance the aesthetic appeal of the habitat but also help maintain the moisture levels within the enclosure.
5. Sprinkle Isopod Cereal
Sprinkle some Isopod Cereal on top of the sphagnum moss. This nutritious food source ensures that your isopods receive the necessary nutrients for their growth and reproduction.
6. Allow the Container to Settle
Give the container a day or two to settle before introducing any isopods. This allows the substrate and sphagnum moss to stabilize and reach the ideal moisture level for the isopods.
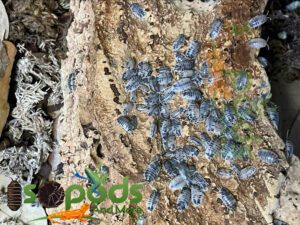
7. Introduce Isopods
Once the container has settled, gently introduce your isopods to their new home. Place them on top of the substrate and avoid disturbing the container for a few days, allowing the isopods to acclimate to their new environment.
8. Monitor the Container
Regularly check the container to ensure that the moisture level, temperature, and air circulation are optimal for your isopods’ needs. Adjust the moisture level and temperature as necessary and replenish the Isopod Cereal when needed.
Isopod Care Tips for a Happy and Healthy Colony
In addition to setting up the perfect isopod habitat, providing proper care is essential for the long-term well-being of your isopods. Here are some care tips to ensure a happy and healthy isopod colony:
1. Temperature and Humidity
Maintain the appropriate temperature and humidity levels within the enclosure. Isopods thrive in temperatures ranging from 70°F to 80°F (21°C to 27°C) and require a humidity level of around 70%.
2. Feeding
Continue providing Isopod Cereal or other high-quality isopod food regularly. Supplement their diet with fresh fruits and vegetables, such as carrots, cucumbers, and apples. Remove any uneaten food to prevent mold growth.
3. Substrate Maintenance
Monitor the moisture level of the substrate and adjust as necessary. Mist the enclosure with water to maintain the desired humidity level. If the substrate becomes too dry, add a bit of water, and if it becomes too wet, allow it to dry out slightly.
4. Cleaning
Regularly inspect the enclosure for any waste or uneaten food. Remove any debris to maintain a clean and hygienic environment for your isopods.
Breeding Isopods: Techniques and Tips
Breeding isopods can be a rewarding experience, allowing you to witness the life cycle of these fascinating creatures. Here are some techniques and tips to enhance your isopod breeding success:
1. Provide Optimal Conditions
Maintain the ideal temperature, humidity, and substrate moisture levels to create a conducive environment for breeding. Isopods breed most successfully when the conditions mimic their natural habitat.
2. Multiple Hiding Places
Ensure that your isopod enclosure has ample hiding places, such as cork bark flats, leaf litter, or hollow logs. These hiding spots provide shelter for pregnant females and protect the newborn isopods.
3. Separating Males and Females
Consider separating male and female isopods to control breeding. Once you notice the presence of eggs or newborn isopods, you can reintroduce the males to initiate breeding again.
4. Patience is Key
Breeding isopods takes time and patience. It may take several weeks or even months for eggs to hatch and reach maturity. Monitor the enclosure closely, and be prepared for the rewarding experience of witnessing the birth and growth of new isopods.
Conclusion
Isopod culture is an exciting and rewarding hobby that allows you to appreciate the wonders of nature up close. With the Isopod Culture Kit and the tips provided in this guide, you are well-equipped to create a thriving isopod habitat and nurture a healthy and dynamic isopod colony. Remember to provide proper care, monitor the environment, and enjoy the fascinating journey of breeding and observing these remarkable creatures. Happy isopod culture!